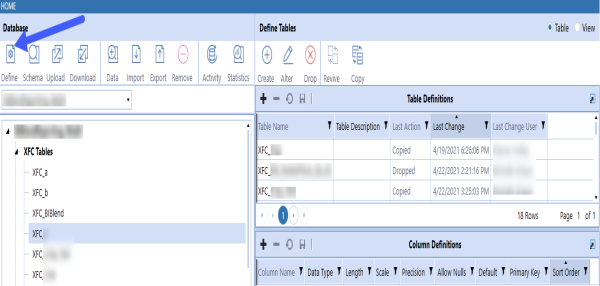
Defining a Table
The Define button allows you to construct a table using the options available in Table Data Manager. The screenshot below shows the steps that correspond to the Defining a Table procedure.
-
Select a database.
-
Click Define. The table definitions are displayed in the right column.
-
Click the Plus from the menu.
-
Enter a table name and a table description for the table you want to edit.
-
Click the Save.
-
Navigate to Column Definitions below Table Definitions.
Tables created within Table Data Manager have the prefix XFC. Table and column names can contain letters, numbers, and underline characters only.
NOTE: Column definitions support the Int,Char, Varchar, Nvarchar, Bit, Bigint, Decimal, Date, Datetime, Time, and UniqueIdentifer data types.