Dashboard Filter Editor
The Dashboard Filter Editor allows Dashboard builders an efficient method to apply filters to external data sources defined by a Business Rule through a Data Adapter.
Data Adapter
A Data Adapter is required to gather information for the Filter Editor. Column names and data types are pulled from the first data table. A second data table can be created if the column display names need to be altered.
NOTE: The second data table must contain the same number of columns and be in the same order as the first table. Only column definitions, not data, needs to be in the second table.
Follow these steps to create a data adapter for Filter Builder:
-
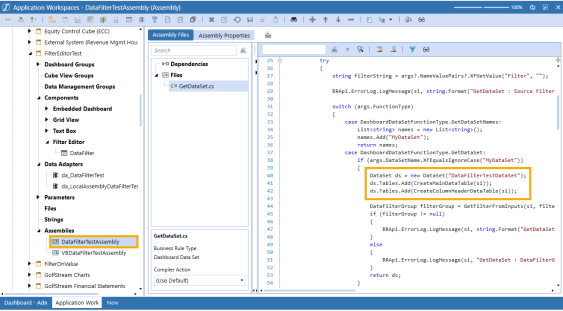
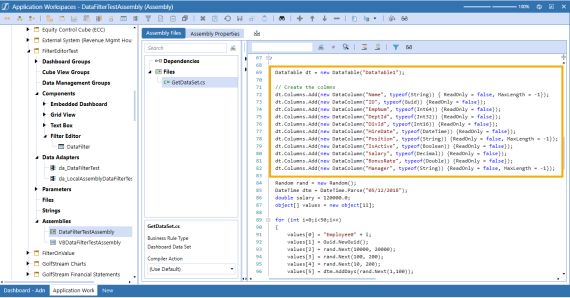
Define the Data Table using a Business Rule with C# or VB.
-
(Optional) To alter the Filter Editor column names for display, create a second Data Table and define new column names.
-
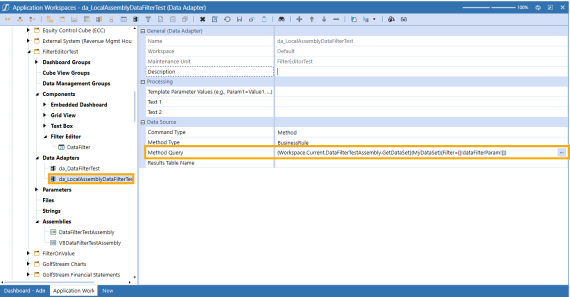
Create the Data Adapter and attach the Business Rule using the Method Command Type.
-
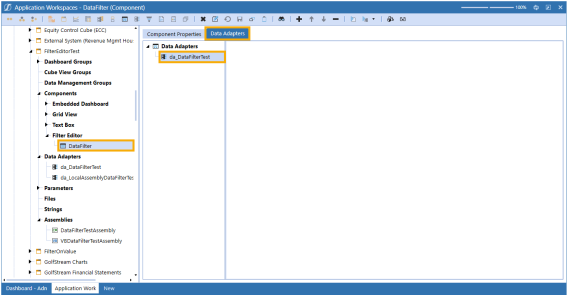
Create the Filter Editor dashboard component.
-
Attach the Data Adapter and define the properties.
Settings
Customize your filter editor settings from the Component Property tab.
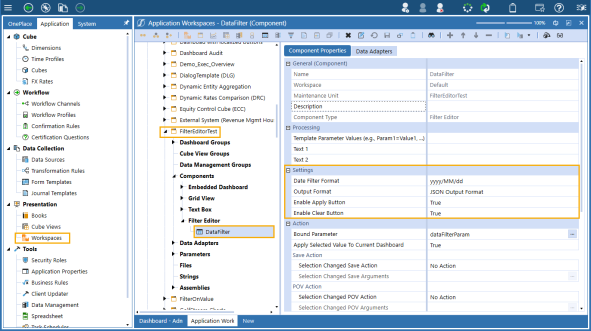
Date Filter Format
Select a format from the drop-down menu to change the appearance of the date in the filter builder.
Output Format
Change the output format to JSON or XML.
Enable Apply Button
Select True to allow the user to build the formula and manual select when to apply it. Select False to have the filter run automatically after each selection.
Enable Clear Button
Select True to allow the user to clear the entire editor at once. Select False to remove the Clear button, allowing the user to only delete a single formula at a time.
Build the Filter
From the Application tab, navigate to Workspaces > Maintenance Units > your targeted Maintenance Unit > Dashboard Groups > Dashboard. Click View Dashboard  .
.
Filter your data using the Filter Editor.
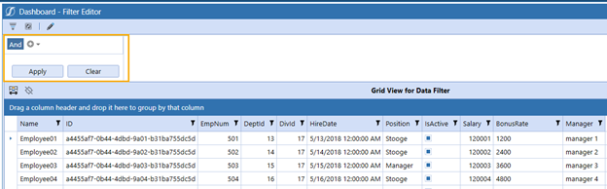
Build your filter using operators And, Or, Not And, and Not Or as part of a Condition, Group, or Custom Expression.
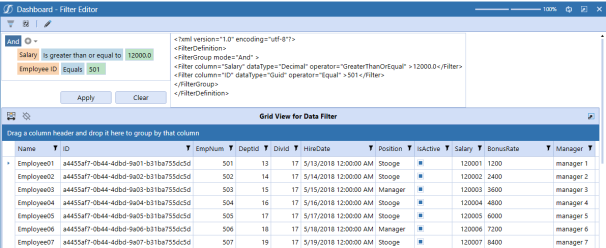
Click the + icon to add a Condition. Use the dropdown to select a Condition, Group, or Custom Expression. Click the x icon when hovered over a condition to delete that line item.
Click Apply to filter your data based on the filter. Click Clear to remove the entire filter.
Click in each box for a valid dropdown menu of choices or the ability to enter text.
NOTE: When selecting Add Custom Expression, the Expression Editor dialogue box displays. Double click each selection to build your expression then click OK. Click Apply to run the filter.